Installing Longhorn: Distributed Storage for Kubernetes

In our previous article, we installed and configured MetalLB and NGINX Ingress Controller to expose our Kubernetes services to the outside world using a clean and reliable approach.
With networking and ingress sorted, it's time to address another critical part of running applications in Kubernetes, which is storage.
By default, Kubernetes provides only ephemeral storage for pods, meaning when a pod is deleted or rescheduled, its data is lost. For stateful applications like databases, media servers, or even personal services, we want the data to persist. This is where Longhorn comes in.
Why Longhorn?
Longhorn is a lightweight, open-source distributed block storage system for Kubernetes.
Here's why Longhorn is a great fit for HomeLabs:
- Distributed Storage: Data is replicated across multiple nodes
- Self-Healing: If a node or disk fails, Longhorn rebuilds the replicas automatically
- Simple UI: Comes with its own dashboard for easy monitoring and management.
- Snapshots & Backups: Built-in tools for taking consistent snapshots and backups.
In short, Longhorn allows us to run stateful applications directly in Kubernetes with reliable, redundant storage.
What We'll Cover
- Installing Longhorn in Kubernetes (via Helm)
- Accessing the Longhorn UI
- Configuring Longhorn as the default storage class
Hardware / Setup Requirements
- A working Kubernetes cluster from our previous article
- At least two worker nodes (recommended three) with extra disk space
- MetalLB & Ingress Controller setup (from the previous article) - To expose the Longhorn UI via a domain
Steps to Install Longhorn:
Before we install Longhorn, let's make sure the required packages are available on all our Ubuntu nodes. The easiest way to install these required packages is to use the Longhorn CLI (longhornctl). It can automatically check and install these dependencies.
- First, we need to remove any previous installations of
longhornctl.
rm -rf /usr/local/bin/longhornctl
- Now we can proceed with installing Longhorn CLI on a node.
# Download the CLI (replace v1.9.1 with the latest Longhorn version)
curl -L https://github.com/longhorn/cli/releases/download/v1.9.1/longhornctl-linux-amd64 -o longhornctl
chmod +x longhornctl

# Move the file to /usr/local/bin
sudo mv ./longhornctl /usr/local/bin/longhornctl
- We can verify if our installation is successful using the version command.
longhornctl version
We have successfully installed longhornctl on our nodes. Now we can proceed to install the dependencies.
- Run the preflight checker to check the packages that are required for Longhorn installation.
export KUBECONFIG=~/.kube/config
longhornctl check preflightlonghornctl can talk to our Kubernetes cluster
- We can see that in my cluster, I have all the prerequisites already installed. But if for you it might show up some dependencies that would need to be installed.
- We can auto-install the prerequisites using the command below.
longhornctl install preflight
- The prerequisites have been installed successfully. We can reboot our nodes once, just for the new modules to get reflected. We are now good to go to install Longhorn.
- We will now be installing Longhorn via Helm.
# Add the Longhorn Helm repository
helm repo add longhorn https://charts.longhorn.io

# Fetch the latest charts from the repository
helm repo update

# Install Longhorn in the longhorn-system namespace
helm install longhorn longhorn/longhorn --namespace longhorn-system --create-namespace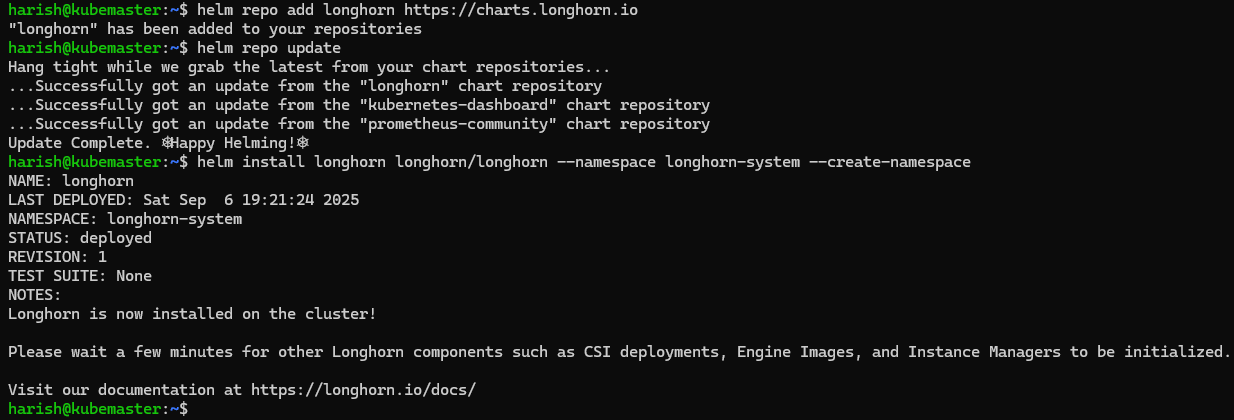
- To confirm that the deployment succeeded, we can run:
kubectl -n longhorn-system get pod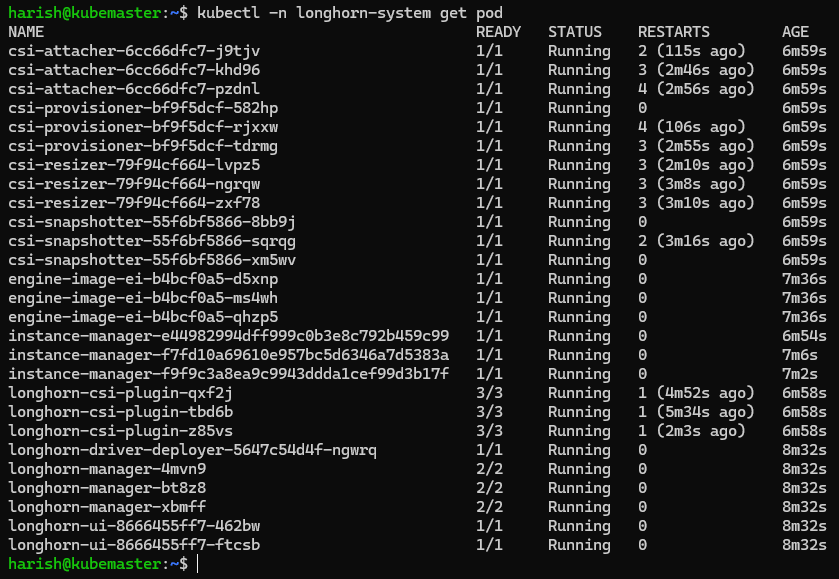
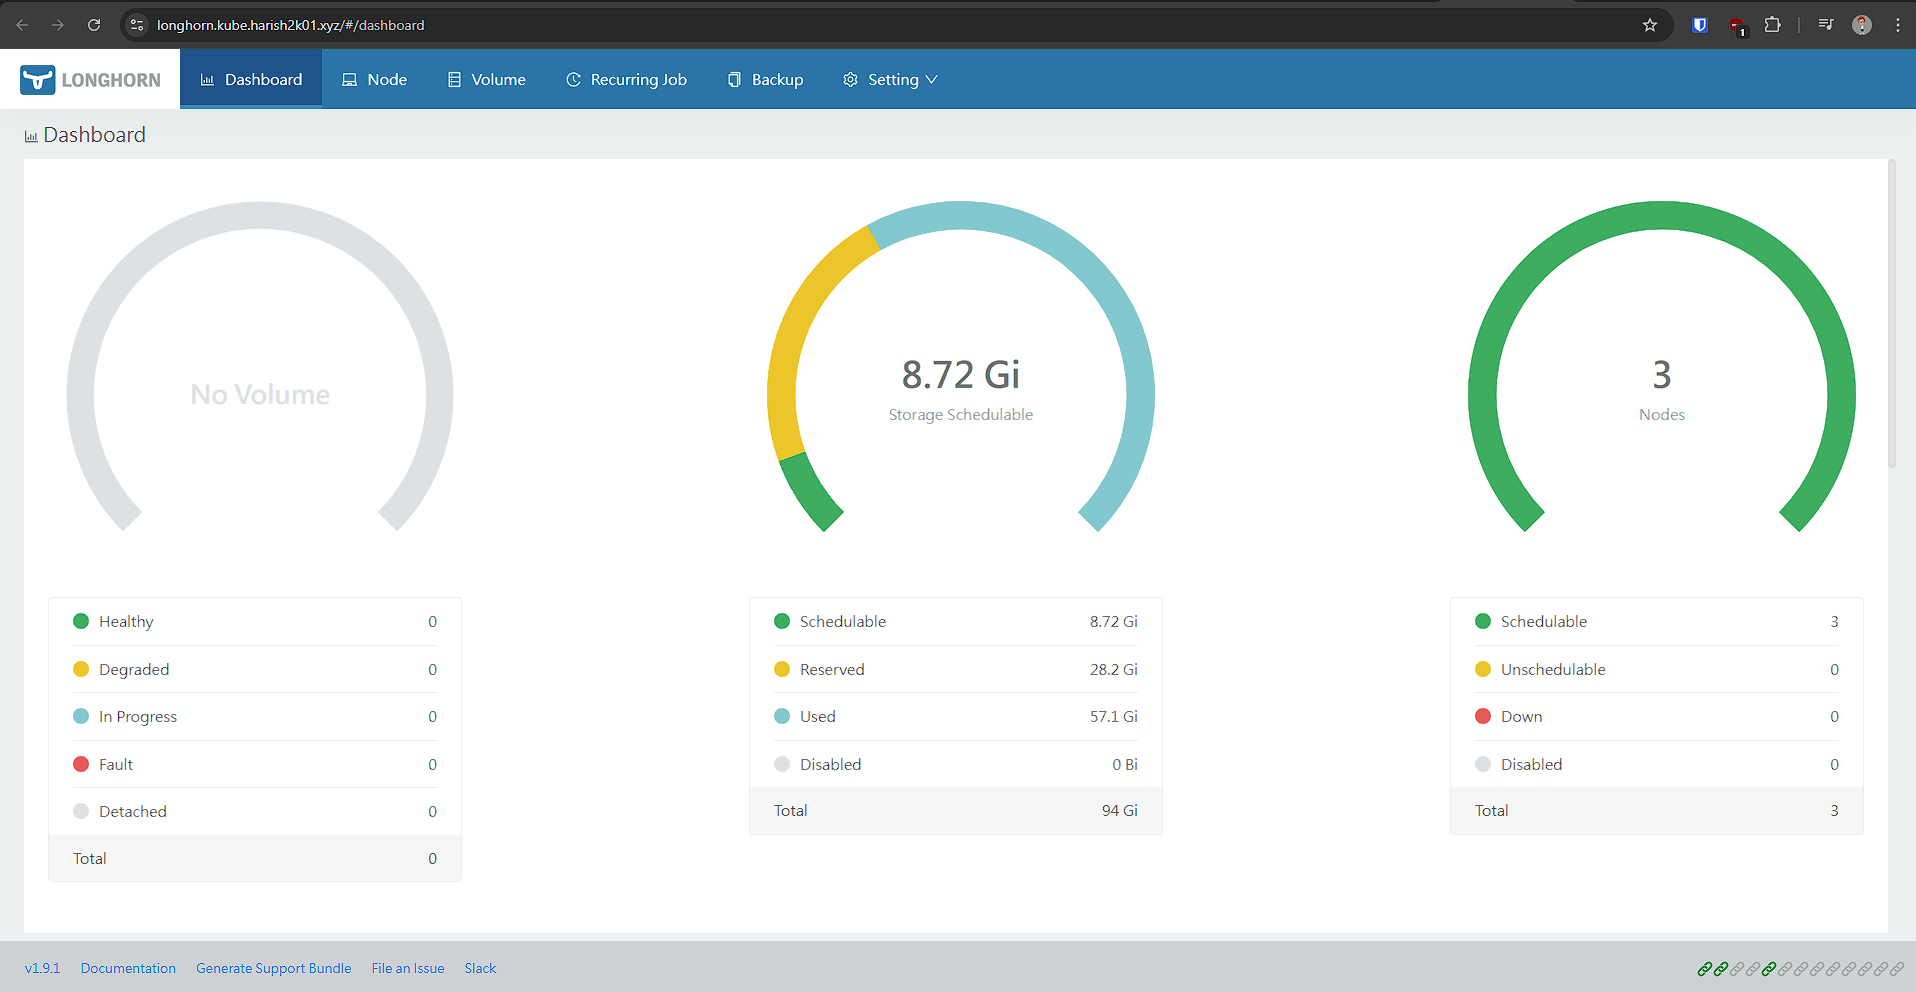
Give it some time for all the needed pods to spin up without any errors. We can now see that all pods are running successfully without any issues. We have successfully installed Longhorn on our Kubernetes cluster.
Accessing the Longhorn UI:
Longhorn comes with a web-based UI. To access it, we need to expose the longhorn-frontend service.
- First, we can check the service using:
kubectl get svc -n longhorn-system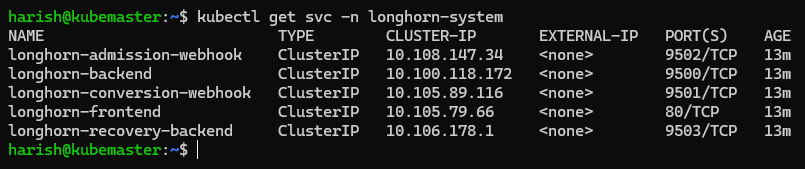
- Now, to make this accessible outside the cluster, we can change the type of the longhorn-frontend service from ClusterIP to NodePort, and then we can use the IP of any of our nodes to access the UI.
- But since we have configured ingress in our last article, we will be using ingress to access Longhorn UI, as it would be the production way.
- Create an Ingress manifest longhorn-ingress.yaml
apiVersion: networking.k8s.io/v1
kind: Ingress
metadata:
  name: longhorn-ingress
  namespace: longhorn-system
  annotations:
    # prevent the controller from redirecting (308) to HTTPS
    nginx.ingress.kubernetes.io/ssl-redirect: 'false'
    # custom max body size for file uploading like backing image uploading
    nginx.ingress.kubernetes.io/proxy-body-size: 10000m
spec:
  ingressClassName: nginx
  rules:
  - host: longhorn.kube.harish2k01.xyz
    http:
      paths:
      - pathType: Prefix
        path: "/"
        backend:
          service:
            name: longhorn-frontend
            port:
number: 80- Now in my network, I have configured my SSL certs and my DNS to point to this cluster for all *.kube.harish2k01.xyz sub-domains. Hence, I can directly give the domain name under the host section in the above ingress file.
- Make sure to take care of this in your network configurations so that you will be able to access the Longhorn UI.
- We can apply the ingress configuration using:
kubectl apply -f longhorn-ingress.yaml
We have successfully configured our Ingress for Longhorn, and now we will be able to access the Longhorn UI.
Configuring Longhorn as Default StorageClass:
- Kubernetes uses a StorageClass to provision persistent volumes. We can check the available storage classes using:
kubectl get storageclass
- We can notice Longhorn has been created. By default, Longhorn installs a StorageClass named longhorn.
- However, we can define our own with custom parameters and set it as the default so that any PersistentVolumeClaim(PVC) without a storage class will automatically use Longhorn.
- Create a new file longhorn-storageclass.yaml with your custom parameters if needed. Refer to the official documentation for the details of the parameters.
apiVersion: storage.k8s.io/v1
kind: StorageClass
metadata:
  name: longhorn-storageclass
  annotations:
    storageclass.kubernetes.io/is-default-class: "true"
provisioner: driver.longhorn.io
parameters:
  numberOfReplicas: "2"   # Store each volume on 2 different nodes
allowVolumeExpansion: true
reclaimPolicy: Retain
volumeBindingMode: Immediate- We can apply the config using:
kubectl apply -f longhorn-storageclass.yaml
Longhorn has now become our default storage class, and all our future PersistentVolumeClaims will now use Longhorn for storage.
In this article, we:
- Installed Longhorn in our Kubernetes cluster using Helm
- Exposed the Longhorn UI using Ingress
- Configured Longhorn as the default storage class
With Longhorn in place, our cluster is no longer limited to ephemeral workloads. We can now deploy databases and any app that needs reliable persistent volumes.
In the next article, we will be looking into another service that we will be deploying in our Home Lab. Stay tuned for more detailed instructions on expanding our Home Labbing capabilities.
Happy Homelabbing!!!


Member discussion