Installing Kubernetes: Building a Bare-Metal Cluster
In our previous articles, we explored setting up essential self-hosted media services like Jellyfin, TrueNAS, AdGuard Home, and others to build a comprehensive home media experience. Now, it's time to take things a step further.
In this article, we'll explore the step-by-step process of installing Kubernetes on a bare-metal server, right inside our Home Lab.
Why Kubernetes?
Kubernetes is the industry-standard container orchestration platform. It lets us manage containerized applications at scale easily with automated deployments, scaling, and management. Whether we're running a handful of Docker containers or a complex microservice architecture, Kubernetes brings powerful tooling to the mix.
While cloud providers like AWS offer managed Kubernetes services, there's something uniquely powerful and satisfying about running your own bare-metal Kubernetes cluster - fully private and under your control.
What We'll Cover
- Preparing our servers for Kubernetes
- Installing container runtime (containerd)
- Installing kubeadm, kubelet, and kubectl
- Initializing the control plane
- Installing a CNI (Calico)
- Verifying and accessing the cluster
Hardware Requirements for Bare-Metal Kubernetes
Before diving into the Kubernetes installation, let's ensure our hardware is ready to handle the workload. These requirements are suited even for a Home Lab setup using Proxmox VMs, old laptops, or mini PCs.
- Master Node: 2 cores, 4 GB RAM, 20 GB Storage, Static IP
- Worker Node: 2 cores, 4 GB RAM, 40 GB Storage, Static IP
Just make sure all nodes are on the same network. These are just the minimum requirements, and try to allocate more resources for worker nodes if available, as they would be doing the heavy lifting mostly.
Steps to install Kubernetes:
Throughout this article, I'll be using 3 VMs (1 Control Plane and 2 Worker Nodes) that are running Ubuntu Server inside Proxmox to deploy our Kubernetes Cluster. All three VMs have Static IPs assigned to them with internet access.
Choose one VM to serve as the master (control plane) node. Log into it via SSH or Proxmox console, and follow the steps below:
Control Plane / Master Node:
- The first thing is to turn swap off. Kubernetes requires swap to be turned off on all nodes. The below command disables the swap usage.
sudo swapoff -a
sudo sed -i '/ swap / s/^\(.*\)$/#\1/g' /etc/fstab
- Now, we need to load the network-related modules that are needed for Kubernetes. The following commands configure the sysctl parameters needed for the pod networking.
# Loads the overlay and br_netfilter kernel modules
cat <<EOF | sudo tee /etc/modules-load.d/k8s.conf
overlay
br_netfilter
EOF

sudo modprobe overlay
sudo modprobe br_netfilter

cat <<EOF | sudo tee /etc/sysctl.d/k8s.conf
net.bridge.bridge-nf-call-iptables  = 1
net.bridge.bridge-nf-call-ip6tables = 1
net.ipv4.ip_forward                 = 1
EOF

# Apply sysctl params without reboot
sudo sysctl --system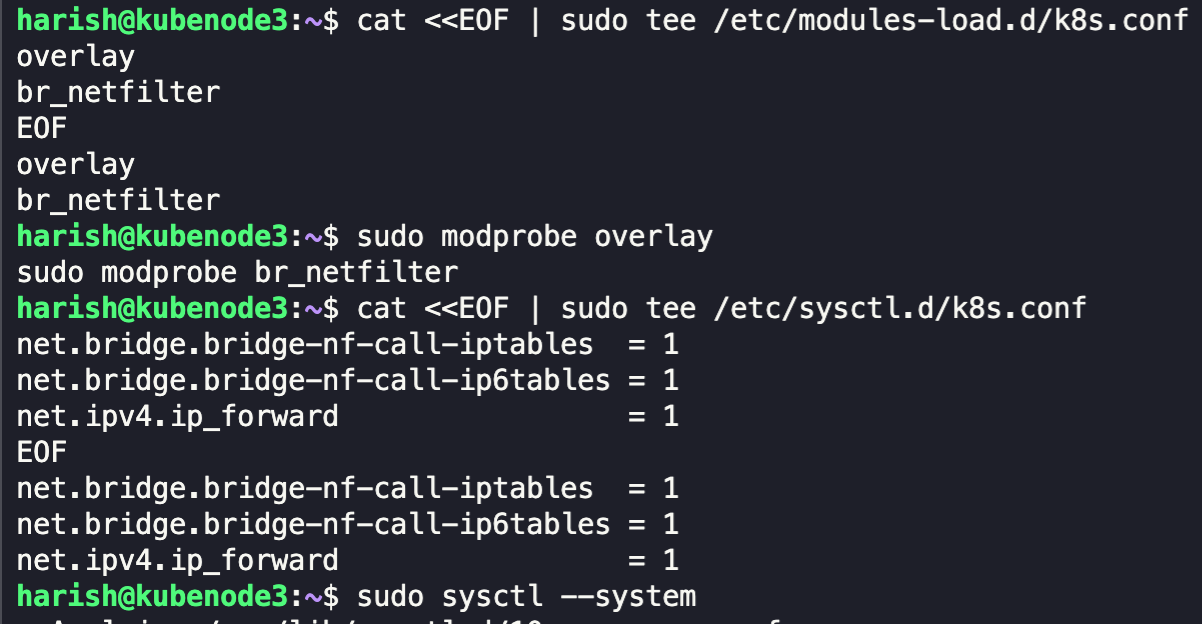
- We now need to install a container runtime so that Kubernetes can manage the pods. We will be installing containerd, which is a lightweight container runtime.
# Set the latest version of containerd
CONTAINERD_VERSION=2.1.3

# Download and extract the latest version
curl -LO https://github.com/containerd/containerd/releases/download/v${CONTAINERD_VERSION}/containerd-${CONTAINERD_VERSION}-linux-amd64.tar.gz
sudo tar Cxzvf /usr/local containerd-${CONTAINERD_VERSION}-linux-amd64.tar.gz

# Download the containerd service
curl -LO https://raw.githubusercontent.com/containerd/containerd/main/containerd.service

# Move the files to the system directories
sudo mkdir -p /usr/local/lib/systemd/system/
sudo mv containerd.service /usr/local/lib/systemd/system/
sudo mkdir -p /etc/containerd

# Set the configuration for containerd
containerd config default | sudo tee /etc/containerd/config.toml
sudo sed -i 's/SystemdCgroup \= false/SystemdCgroup \= true/g' /etc/containerd/config.toml

# Enable and start the service
sudo systemctl daemon-reload
sudo systemctl enable --now containerd

# Check that the containerd service is up and running
systemctl status containerd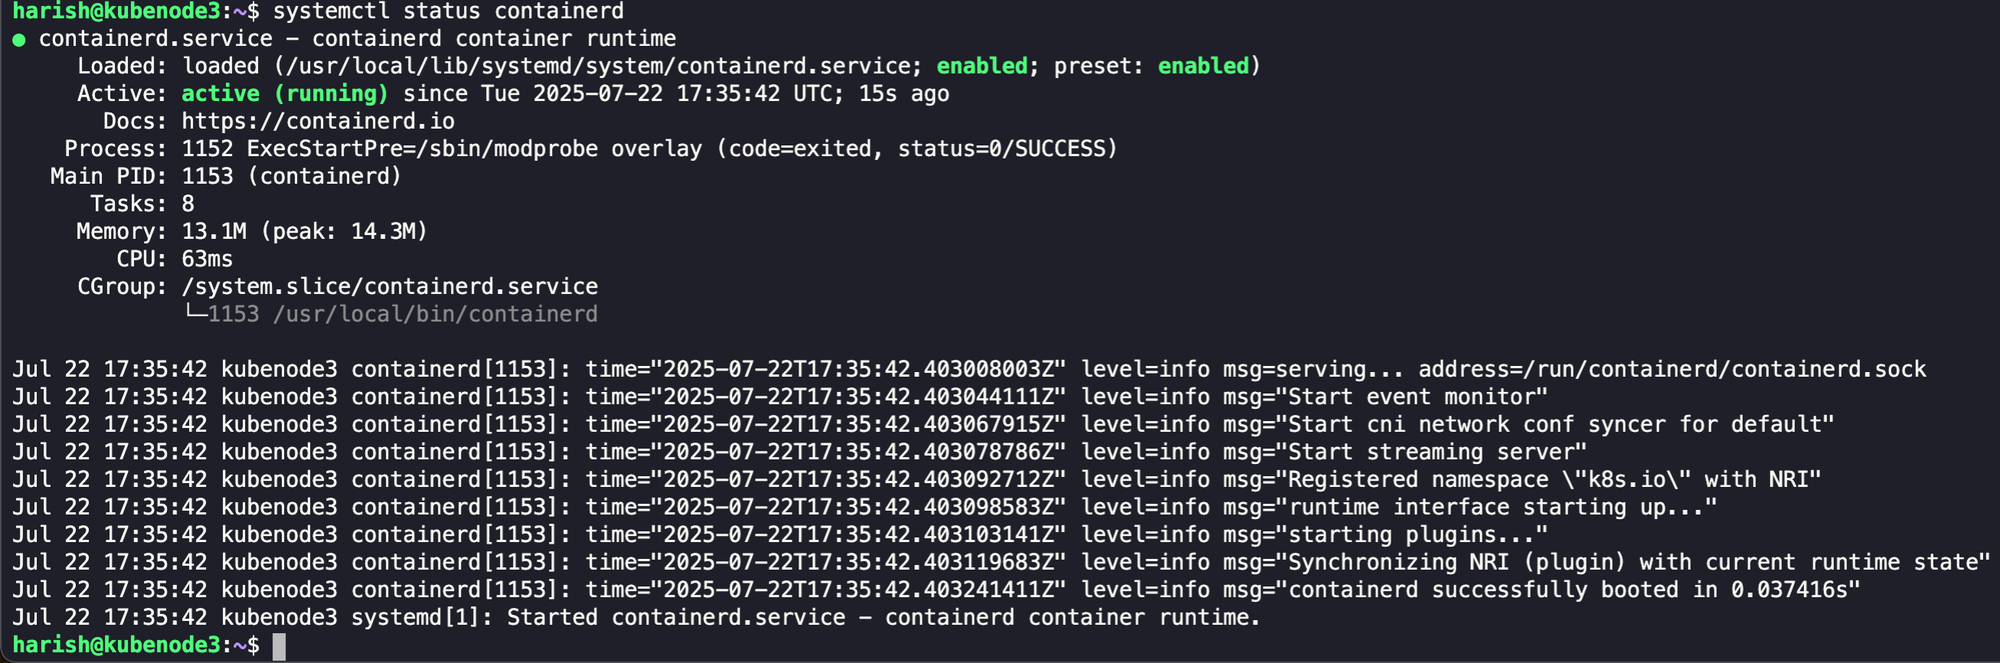
- containerd uses a CLI tool called runc under the hood to maintain container processes. We can use the commands below to install the same.
# Set the latest version of runc
RUNC_VERSION=1.3.0

# Download the latest version
curl -LO https://github.com/opencontainers/runc/releases/download/v${RUNC_VERSION}/runc.amd64

# Make the binary executable and move it to the appropriate location
sudo install -m 755 runc.amd64 /usr/local/sbin/runc
- Kubernetes handles networking like assigning IPs and connecting pods with the help of Container Network Interface (CNI) plugins. Without CNI plugins, pods won't get network interfaces. We can now install the same.
# Set the latest version of cni plugin
CNI_VERSION=1.7.1

# Download the latest version
curl -LO https://github.com/containernetworking/plugins/releases/download/v${CNI_VERSION}/cni-plugins-linux-amd64-v${CNI_VERSION}.tgz

# Extract the same
sudo mkdir -p /opt/cni/bin
sudo tar Cxzvf /opt/cni/bin cni-plugins-linux-amd64-v${CNI_VERSION}.tgz
- We can now start with installing the Kubernetes components.
- kubeadm: CLI tool that simplifies the process of configuring a Kubernetes cluster
- kubelet: Manages containers on each node
- kubectl: CLI tool to control the cluster
# Update the system
sudo apt-get update
sudo apt-get install -y apt-transport-https ca-certificates curl gpg

# Set the latest version of Kubernetes
KUBERNETES_VERSION=1.33

# If the directory `/etc/apt/keyrings` does not exist, it should be created before the curl command
# sudo mkdir -p -m 755 /etc/apt/keyrings

# Configure the Kubernetes repository
curl -fsSL https://pkgs.k8s.io/core:/stable:/v${KUBERNETES_VERSION}/deb/Release.key | sudo gpg --dearmor -o /etc/apt/keyrings/kubernetes-apt-keyring.gpg
echo "deb [signed-by=/etc/apt/keyrings/kubernetes-apt-keyring.gpg] https://pkgs.k8s.io/core:/stable:/v${KUBERNETES_VERSION}/deb/ /" | sudo tee /etc/apt/sources.list.d/kubernetes.list

# Install the components
sudo apt-get update
sudo apt-get install -y kubelet kubeadm kubectl
sudo apt-mark hold kubelet kubeadm kubectl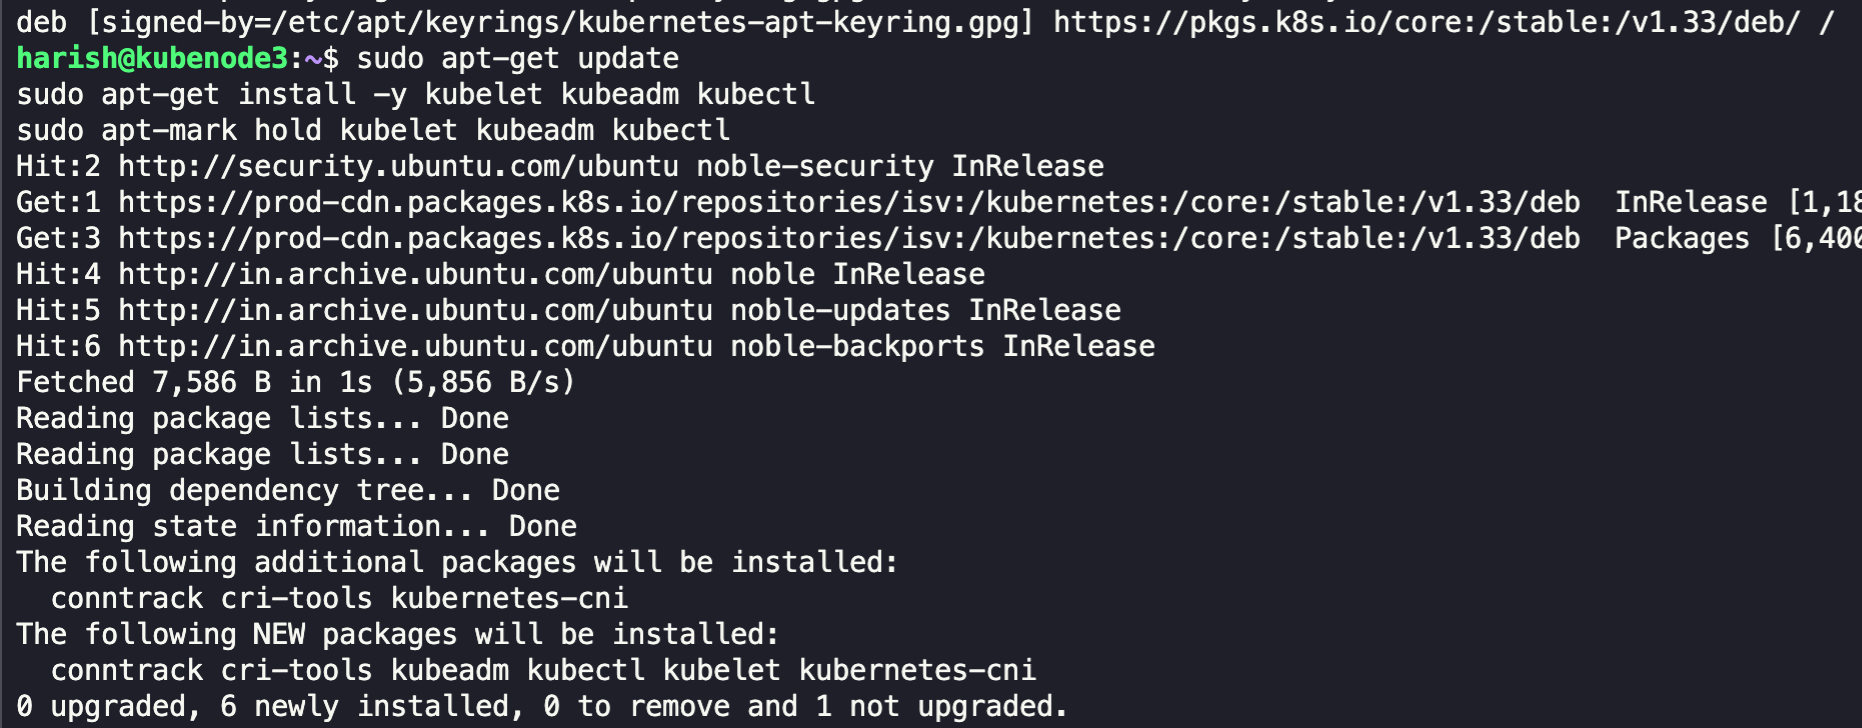
- We have successfully installed the core components. We now have a few configurations to make before proceeding to create our cluster. Now we need to configure crictl to talk to containerd via its socket. crictl is a CLI tool to inspect and debug containers managed by containerd.
sudo crictl config runtime-endpoint unix:///var/run/containerd/containerd.sock
- We can now initialize the control plane on our master node.
sudo kubeadm init --pod-network-cidr=192.168.0.0/16 --apiserver-advertise-address=10.10.10.253 --node-name master2. apiserver-advertise-address: Provide the Static IP of the server / VM in which the server is running. All external communications to user/worker nodes take place using this IP address
3. name: Provide the hostname of the server/vm

kubeadm would perform a few preflight checks and then would start to install and configure the needed components for the Kubernetes control plane node. Now, after a successful configuration, we will receive the following message.
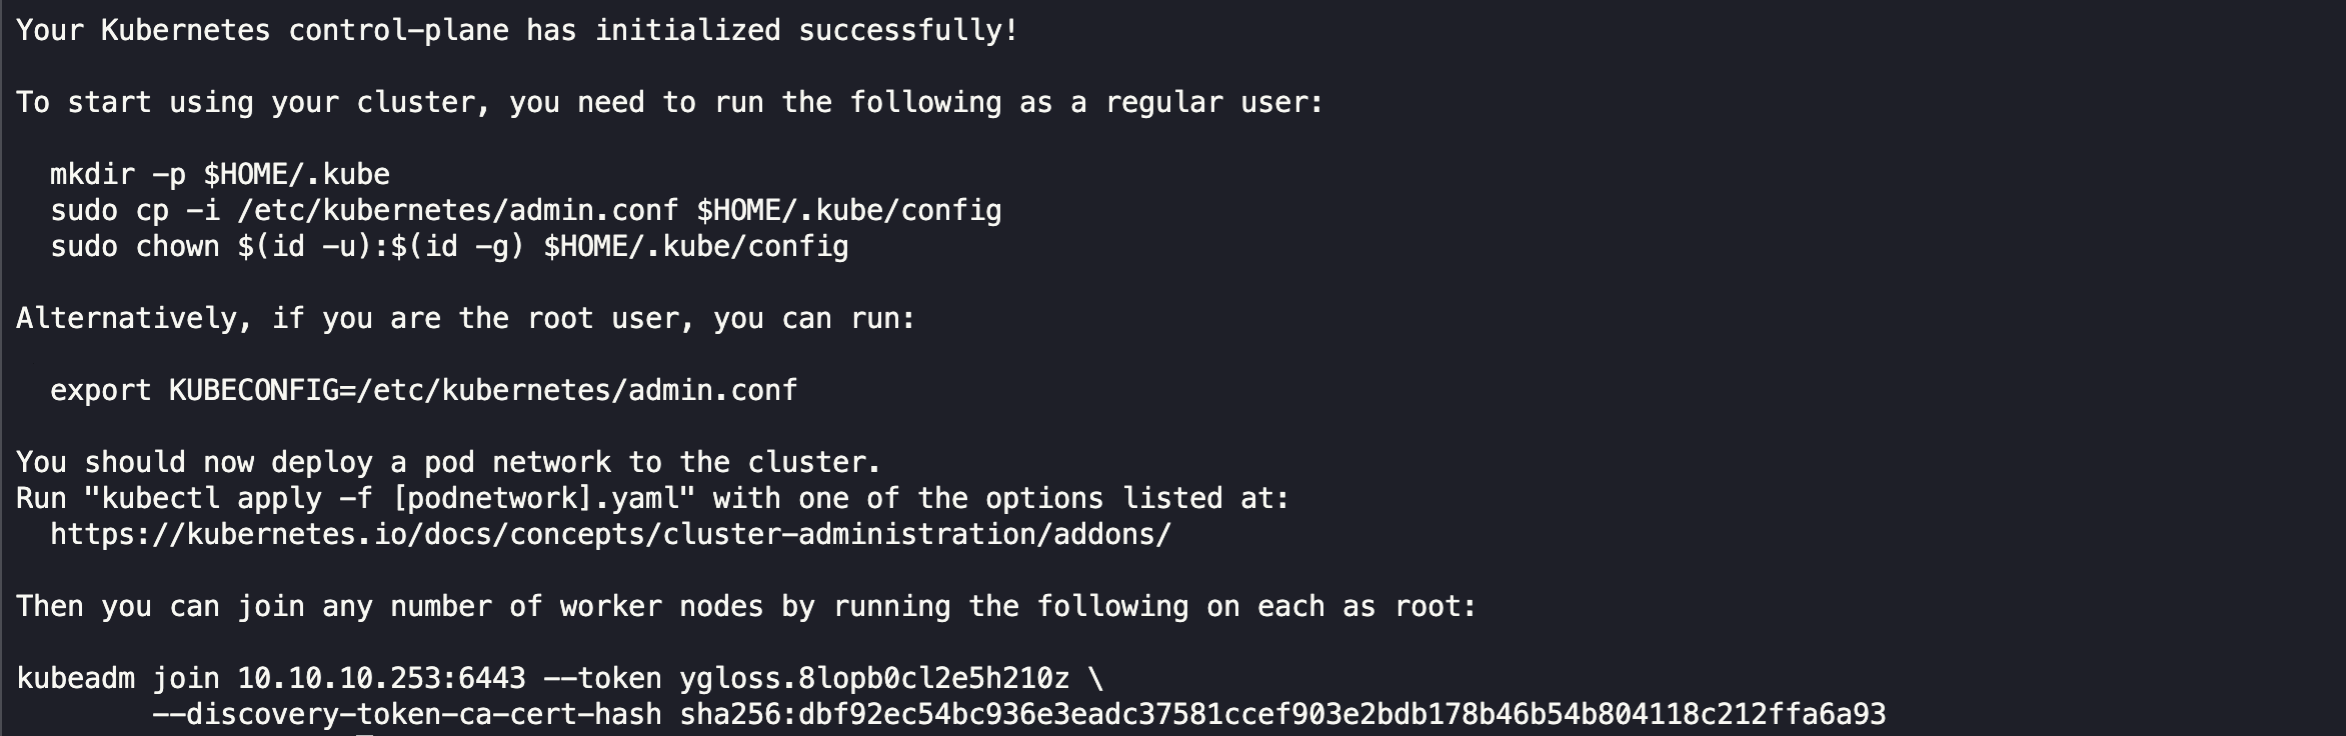
- To allow a non-root user to access the cluster, copy the kubeconfig to their home directory using the commands below. The same is shown in the output after we initialized our control plane.
mkdir -p $HOME/.kube
sudo cp -i /etc/kubernetes/admin.conf $HOME/.kube/config
sudo chown $(id -u):$(id -g) $HOME/.kube/config
- The final step of completing our control plane configuration is to install Calico. It sets up pod-to-pod networking using the same CIDR from 'kubeadm init' and is popular for its performance and built-in network policy support.
# Set the latest version of Calico
CALICO_VERSION=3.29.5

# Tigera Operator
kubectl create -f https://raw.githubusercontent.com/projectcalico/calico/v${CALICO_VERSION}/manifests/tigera-operator.yaml

# Download Calico Custom Resource
curl https://raw.githubusercontent.com/projectcalico/calico/v${CALICO_VERSION}/manifests/custom-resources.yaml -O

# Apply the manifest file to deploy Calico & Tigera Operator
kubectl apply -f custom-resources.yaml
We have now successfully deployed our control plane node and configured the needed items for our control plane to work smoothly when our worker nodes are connected.
We can check if all our control plane pods are running fine by using the following command:
kubectl get pods -A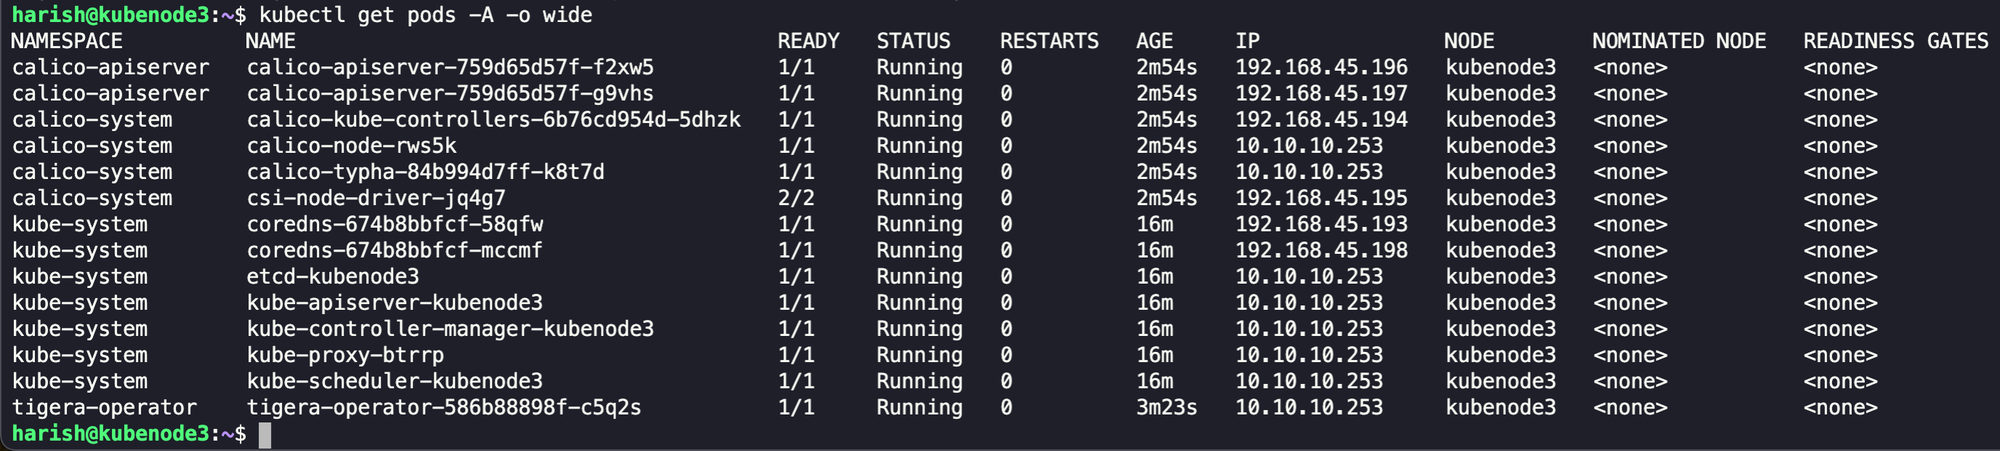
Worker Node:
- Now, to configure the Worker Nodes, follow the steps 1-7 listed in the Control Plane / Master Node configurations to install all needed components to join our worker node with the control plane.
- Once done, we can use the join command with the token that was available when we configured the master node. The join token can be printed again by using the command below in the master node.
kubeadm token create --print-join-command
- We can now use this token in our Worker Node to join this node to our control plane.
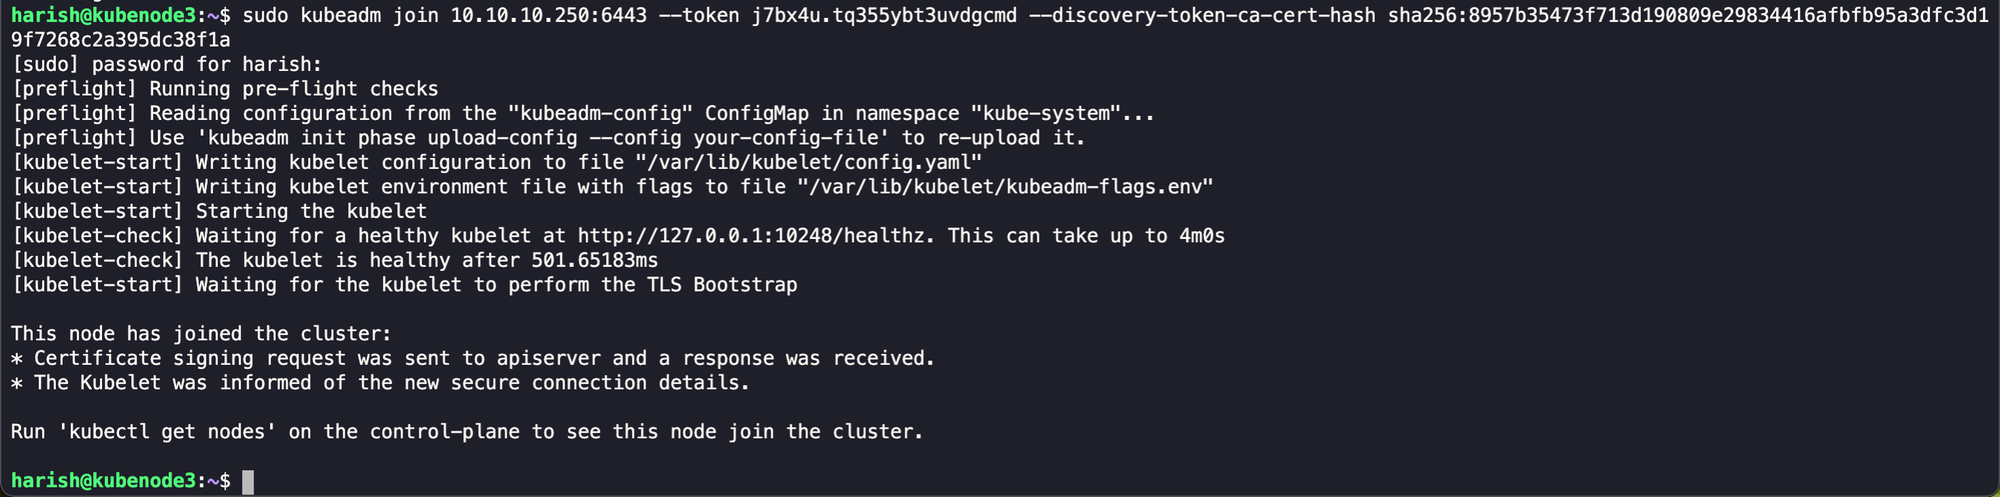
We have now successfully added our worker node to our control plane. We can validate the same by using the below command on our control plane/master node.
kubectl get nodes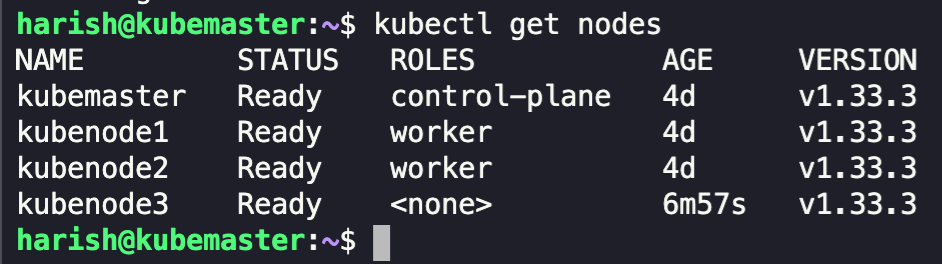
We can see that our worker node has been newly added to our control plane.
We've successfully built a robust, bare-metal Kubernetes cluster right from our Home Lab and also covered the foundational steps to get our cluster up and running smoothly.
In the next article, we will be looking into another service that we will be deploying in our Home Lab. Stay tuned for more detailed instructions on expanding our Home Labbing capabilities.
Happy Homelabbing!!!


Member discussion